Help:Editing:Basics: Difference between revisions
No edit summary |
|||
| Line 114: | Line 114: | ||
One of the reasons you should not need to do much beyond italics is that you don't need '''bold''' or different font sizes to make subheadings. Subheadings at different levels are made by putting different numbers of '=' signs around text on a line, where the string of equals signs are the first thing on the line. | One of the reasons you should not need to do much beyond italics is that you don't need '''bold''' or different font sizes to make subheadings. Subheadings at different levels are made by putting different numbers of '=' signs around text on a line, where the string of equals signs are the first thing on the line. | ||
On DNZ pages, the Page Title is a level 1 heading, so start any headings with two = signs, and increase the number for subheadings and sub-subheadings. Headings made in this way are automatically used to generate a table of contents for each page in outline format, like the one for this page | Example: The heading for this section, Subheadings, is made with this notation: <nowiki>===Subheadings===</nowiki> | ||
On DNZ pages, the Page Title is a level 1 heading, so start any headings with two = signs, and increase the number for subheadings and sub-subheadings. Headings made in this way are automatically used to generate a table of contents for each page in outline format, like the one for this page. | |||
===Categories=== | ===Categories=== | ||
Revision as of 13:57, 15 September 2010
Tips for Beginners
- Content is more important than formatting. The wiki system allows more experienced proofreaders to clean up your entries if they don't have perfect formatting. Go ahead and put something in the wiki, and then ask for help if you want someone to clean up the formatting or discuss the content with you. As you gain experience you can help others with their pages.
- You can try out different editing techniques on any page. Don't worry about making a mistake, any page can be edited again or automatically reverted to earlier versions.
- You can't mess up anything so badly that we can't go back to the previous version.
- Every change is saved by the system and it is easy to track who did what when, so don't worry about losing work or being confused about who edited which page.
- Use the discussion pages to make notes for others or start discussions about content.
Editing Existing Pages
To edit a page, click either the edit tab on top of the display, or one of the edit links for a specific subsection. This will bring up an editing form.
The editing form includes a few helpful buttons at the top that will allow you to Bold, italicize, [[link words]] and perform several other actions.
One of the most important buttons is the second to last in that upper display. The one that looks like part of a signature. It IS a signature. Whenever you leave a note or a comment on a discussion page, remember to sign your name. This can be easily done by click that penultimate button, which produces a special signature: --~~~~
This little signature will turn into a timestamp with a link to your user page and will allow other users to know when you made your note and how to reply to you. This is what it will look like when you save the page: --Marcus 17:49, 15 September 2010 (UTC)
Notice that the bottom of the edit page also contains a wealth of resources. All the diacritic marks (in unicode) area there. Simply click on one of the buttons and the desired letter will appear where you left your cursor. There are also a number of helpful buttons for editing and formatting, such as center tags for making your text centered on the page, Tibetan script tags and more.
Starting New Pages
There are different ways of creating new pages in the wiki.
Using Stubs
Almost any page you want to create has a pre-made "template" called a "stub". The list of stubs is here: Stubs Category Page.
Use a stub whenever you want to create a new page. Simply paste the contents of the stub into a new page and fill in the information, paying careful attention to replacing words in ALLCAPS with the requested information. For instance, AUTHORNAME may be common in stubs and it is there to remind you to fill in the author's name in that space. These helpful reminders are designed as single words without spaces so that you can easily double-click on them to select and then paste over them, decreasing the time it takes to create a page.
Following a Red Link
Often, you will be reading a page that someone else created that has both Blue and Red text links. Links in red text are to pages that don't exist yet; whoever put in the link thought a page was needed, but didn't get around to creating one. If you click on such a link, you'll get an edit page for that page.
Create new page from search results
Before creating a new page, ALWAYS do a search for the term, name or title first. Someone may have already created the page you want with a slightly different spelling, so look carefully! Someone may have also already created a similar page, so it is always useful to search the system first. If you search for a page and nothing comes up, however, the wiki will always offer you a red link, which will be a chance to create a new page. Simply click on the red link provided and edit the page.
What if I don't like the Page Name after I've saved it?
Moving a page will rename it and create a redirect to the new name. If you can't move the page, ask for help from one of our administrators. If you want to have a different page name link to an existing page, you need to make a redirect. This is done by making a page with the desired nickname, containing only the following:
#REDIRECT [[TARGETPAGENAME]] [[Category:Redirects]]
For example: When you create a person page in the DNZ you should link other spellings of the name to the main page you have created for that person. To
Redirects are useful for cases where there are different ways of referring to the same thing. The DNZ uses as many redirects as possible in order to make finding what you want easier.
Working in Edit Mode

Adding or editing is just like any other web form. Click or drag to select an insertion point, and just type away. Just remember don't use the TAB key to space your text. That will take you out of the editing box.
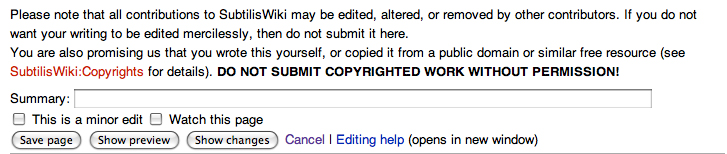
Note that you can preview your changes before saving them. This is useful, since things don't always come out as expected, but you should also be sure to save at regular intervals. If you don't, your changes could be lost if your session times out, or if someone else starts editing the page while you're working on it. The show changes button shows you what parts of the page you've changed. The Summary box allows you to put in a short description of why you edited the page. This is optional, but it can be useful for when you, or others, come back and edit the page again. For example, if you delete a material that you think is inappropriate for a page, you might want to explain that to keep others from adding it back without thinking about it. Others may disagree with you and add it back anyway, but in that case, you should work out a neutral consensus text with the other editors. Each page in the wiki has a discussion page which is a good place to work things out.
Here's a common unintended effect:
If your text winds up in a box like this, it's because you started it on a line beginning with one or more blank spaces.  So don't try to indent your paragraphs!
This is all you need to know to start editing. If you're just adding text or fixing typos, you can just go ahead and skip the rest of this tutorial.
Adding Links
One of the most important aspects of making a page useful are the links to other pages. These can be links to other pages in the DNZ or links to pages on other websites or other wikis.
Internal Links
To insert a link to another page in the DNZ, put the name of the page inside a pair of brackets.
- [[What's new?]]
creates
Note that this is case-sensitive. What's New?, what's New?, and what's new? all give red links, indicating no pages with those names. However, if you want different capitalizations to all lead to the same page you can create those pages and have them contain only a REDIRECT statement that points to the original page.
Piped Links
Often, it is useful to link to a page using different text than the page name. For example, at the top of this page, there is a sentence that starts with:
Use the discussion pages or...
This actually links to Help:Discussion Pages, not discussion pages. The link as made using a pipe character (|) between the PAGENAME and the text for the link:
- [[Help:Discussion Pages|discussion pages]]
Linking to a Subsection
To link to a subsection in the middle of the page, use the # sign after the PAGENAME, followed by a subsection name. For example:
- [[Help:Editing:Basics#Italics, Bold, and Bold Italics]]
gives
which links to a subsection on this Help page. Of course, this can be used in a piped link too, as in how to make italics.
Linking to Category Indices
Pages can be placed into categories, and the index pages for different categories are very useful for finding content. The PageName for a Category index is Category:CategoryName, but making a link as
- [[Category:Help]]
Doesn't link to the Help index, it adds the page to that category. To make a link to an index page, add a colon (:) before the PageName, like this:
- [[:Category:Help]]
to get
Again, you can pipe this to give a link to a list of help pages.
External Links
If you just place a URL in the text, it will be converted to a link: http://example.com However, usually you want the linked text to be something other than the raw URL. To do that, put the URL and the link text, separated by a space, inside square brackets like this:
- [http://dnz.tsadra.org/ DNZ home page]
becomes
This external link method will also work for links to other pages inside the DNZ Wiki. However, the internal link methods described above are preferred, because they allow the system to count how the pages link to each other. For example, http://dnz.tsadra.org/index.php/gDams_Ngag_mDzod:Community_Portal does not show up in "What links here" for the Community Portal page
Interwiki Links
There are some external sites that we will be linking to so often that it is useful to have shortcuts for them. These are called interwiki links. We will be able to link directly to Rangjung Yeshe Wiki by using the form:
[[:rywiki:PAGENAMEATRYWIKI|PAGENAMEATRYWIKI]]
Formatting characters
Italics, Bold, and Bold Italics
Occasionally, you may want to make bold text, or bold italic text. The top of every edit page has buttons for each of these. Simply select the text you want to change and click the button. Here's how to do it manually:
| italics | ''italics'' Text is surrounded by two single quote (') marks on each side. |
| bold | '''bold''' Text is surrounded by three single quote (') marks on each side. |
| bold italics | '''''bold italics''''' Text is surrounded by five (three for bold, two for italics) single quote (') marks on each side. |
| 'italicized single quoted' | '' 'italicized single quoted' '' Put a blank space in between the marks for italics and the single quotes you want to appear in the text. |
Subheadings
One of the reasons you should not need to do much beyond italics is that you don't need bold or different font sizes to make subheadings. Subheadings at different levels are made by putting different numbers of '=' signs around text on a line, where the string of equals signs are the first thing on the line.
Example: The heading for this section, Subheadings, is made with this notation: ===Subheadings===
On DNZ pages, the Page Title is a level 1 heading, so start any headings with two = signs, and increase the number for subheadings and sub-subheadings. Headings made in this way are automatically used to generate a table of contents for each page in outline format, like the one for this page.
Categories
To add a page to a category, use
- [[Category:CategoryName]]
This will not be rendered on the page, but will add a category link to the bottom of the page. For example, this page is in the Help category. A list of categories can be found at Special:Categories. Using a new CategoryName creates a new Category. Any given page can belong to multiple categories.